Battery Maintenance 101.
Winter once again and time to button up for that long winter's nap. This year I have an extra duty to perform. Besides covering the Scamp (which didn't work out so well last year) I will need to remove the battery and maintain its charge for the next few months.
I checked the Voltage just before removing the battery, and it was reading 11.4V. It had been sitting since October, and I really didn't know what to expect. I've read where letting a 12V battery get below 10.5v is bad for the long term health of the battery. Hopefully this isn't too low to be properly maintained.
When attached to shore power the Scamp's WFCO converter/charger takes care of battery charging and maintenance. I use a Battery Tender when the battery is out of the Scamp. There's a good article on Batteries and charging here.
Battery Tender and Battery Tender Jr.
I have used a Battery Tender Jr. to maintain my motorcycle battery for years. They are designed only for maintenance, and not recommended to recharge a fully discharged battery. They provide 750 milliamps of power, and cut out when they detect a full charge.
http://batterytender.com/resources/float-charging.htm/
UPDATE:
I have upgraded my charger to a BLACK+DECKER BC6BDW 6 Amp Waterproof Battery Charger / Maintainer
Seems to do a much better job than the puny 750 milliamp Battery Tender.
Tuesday, December 11, 2012
Thursday, October 25, 2012
Afterall it is Fall
Before I put her to bed for a long Winter's nap.
One full season complete, and I think I have most of the bugs worked out. I spent my last camping trip of the season split between New Hampshire and Maine; Plugs out in NH for two nights, and plugged in (with an electric heater!) for two nights in my brother's summer place in Maine. I still have great difficulty backing up, but luckily the trailer and Tucson combo is small enough to get turned around in some very small spaces.
I still have things I want to do to the interior. Shelves for electronics, and for storage. I am looking at the http://www.ikea.com/us/en/catalog/products/30216536/ at IKEA. Modified slightly it should fit in the closet.
Sunday, July 8, 2012
The big chill
For those times when I am able to connect to shore power I was thinking I would purchase one of those little Dormitory fridges. At $25.00 and most likely only a year old they can easily be found in thrift shops shortly after the colleges close for the summer. Finding one was not a problem. Fitting one is. The Cabinet under the stove has an opening of 17.5" wide, and 19"deep. While it is possible to find a 17.5"wide little fridge the one I found, you guessed it, is 18.5" wide. Sure it is easy to trim the opening, but what is not so easy is making a new, matching cabinet door. So for this coming trip I will set the fridge outside and secure the door with bungee. Hopefully a hungry bear won't decide to just take the whole thing.
 UPDATE: Well it worked out fine, almost. I pre-chilled the little fridge at home and then set it inside my Tow Vehicle and plugged it into a 400W inverter. It did not keep its cool. Plugging it in at the campground however re-chilled it in an hour or so.

Monday, May 21, 2012
Plugs Out
Sorry Emma:
I have to apologize to my niece Emma who was trying to help me while I filled the fresh water tank on my Scamp before I headed out on my first plugs-out test ( battery only ) camping trip. I grabbed the hose and turned the water on, then went to fill the tank. Emma is three, and about three feet tall and got a face full of water as it splashed back out of the fresh water filler. Plugs-out should also apply here. The fresh water tank has no air relief valve to allow air to escape as the tank fills with water. With nowhere else to go the air rushed back out the filler hole and soaked my Emma. I plan to remedy the situation by adding a one way vent. Emma got to change her outfit, which I know she loves to do.
An Aquarium check valve should do the trick. http://www.petmountain.com/show_product/11442-519247

Minor successes:
After that little mishap I was off for the weekend to camp in a State Park on cape Cod that does not have electric or water hookups. I was expecting this, and had a fully charged battery. A 110V/12V DVD player with screen, a 110v Fan, and a Sirius Satellite radio that runs off of 12V. I was grateful that it all worked, and that despite a severe lack of counter space or shelf space I managed the weekend without tripping over wires and bringing the whole thing crashing down around me. I definitely want to install some sort of shelf in the corner near the front door to hold a small TV DVD combo, or radio.It will probably have to be a removable one so as not to interfere with the top bunk whenever that is in use.
Minor mishaps:
Leveling a small trailer is in many ways more difficult than leveling a larger one. Larger trailers have leveling jacks! the Scamp has a tongue jack, and some adjustable feet in the rear. No jacks on the sides! While I managed to pull in to the site it became quite obvious that there was no level area that I could park the trailer. Leveling front to back can be done with the tongue jack, but without any option side to side I spent a weekend juggling pots and pans that tended to slide off the cook top, and beer bottles that slid off the counter! I have been told of a jack that fits on the tire of small trailers. http://www.amazon.com/BAL-R-V-Products-Group-28050/dp/B000BH5MAA At $119.00 the price seems kind of steep.

I think I'll stick to using my car jack and laying some LEGO style blocks under the tire. http://www.amazon.com/Camco-44505-RV-Leveling-Blocks/dp/B00480BWCI

I have to apologize to my niece Emma who was trying to help me while I filled the fresh water tank on my Scamp before I headed out on my first plugs-out test ( battery only ) camping trip. I grabbed the hose and turned the water on, then went to fill the tank. Emma is three, and about three feet tall and got a face full of water as it splashed back out of the fresh water filler. Plugs-out should also apply here. The fresh water tank has no air relief valve to allow air to escape as the tank fills with water. With nowhere else to go the air rushed back out the filler hole and soaked my Emma. I plan to remedy the situation by adding a one way vent. Emma got to change her outfit, which I know she loves to do.
An Aquarium check valve should do the trick. http://www.petmountain.com/show_product/11442-519247
Minor successes:
After that little mishap I was off for the weekend to camp in a State Park on cape Cod that does not have electric or water hookups. I was expecting this, and had a fully charged battery. A 110V/12V DVD player with screen, a 110v Fan, and a Sirius Satellite radio that runs off of 12V. I was grateful that it all worked, and that despite a severe lack of counter space or shelf space I managed the weekend without tripping over wires and bringing the whole thing crashing down around me. I definitely want to install some sort of shelf in the corner near the front door to hold a small TV DVD combo, or radio.It will probably have to be a removable one so as not to interfere with the top bunk whenever that is in use.
Minor mishaps:
Leveling a small trailer is in many ways more difficult than leveling a larger one. Larger trailers have leveling jacks! the Scamp has a tongue jack, and some adjustable feet in the rear. No jacks on the sides! While I managed to pull in to the site it became quite obvious that there was no level area that I could park the trailer. Leveling front to back can be done with the tongue jack, but without any option side to side I spent a weekend juggling pots and pans that tended to slide off the cook top, and beer bottles that slid off the counter! I have been told of a jack that fits on the tire of small trailers. http://www.amazon.com/BAL-R-V-Products-Group-28050/dp/B000BH5MAA At $119.00 the price seems kind of steep.
I think I'll stick to using my car jack and laying some LEGO style blocks under the tire. http://www.amazon.com/Camco-44505-RV-Leveling-Blocks/dp/B00480BWCI
Saturday, April 28, 2012
uplifting delight
It has been a while since my last post. This is what happens when work gets in the way of play.
However busy I may be I can't ignore the fact that camping season is nearly here. I know that some people will say that they camp year-round, but in New England most campgrounds do not open until mid May. So with that in mind there are still a few things I want to do before heading out. Tops on my list is installing the LED dome light over the dinette. NOT easier said than done. My 13ft Scamp with fiberglass shell was never designed to have an overhead dome light. No wiring, and more confounding, no place to mount a fixture. Fishing the wires is not a big deal. A small slit in the rat fur and an electrical tape will pull wires easily enough. But how to mount the light?
 There are three options: Drill through the roof fiberglass and rivet it, just like everything else is riveted to the shell, affix it, somehow, most likely with Velcro, to the rat fur, or glue it to the shell. I chose a mix by gluing it to the rat fur. A dollop of construction adhesive, and a prop to hold it tight to the ceiling while it dries. This still leave me the other options, and a fourth option courtesy of http://www.fiberglassrv.com; Gluing or epoxying a wood mounting block to the fiberglass shell and simply screwing the light to the mounting block. For now we'll see how well the construction adhesive holds up.


UPDATE: For some reason this fixture burned out after only an hour or so of continuous use. Maybe a bad fixture, but some people suggest it may be a case of over-voltage, and that LEDs are more susceptible to over-voltages than other, more traditional bulbs are.
The fixture, glued directly to the rat fur seemed to be the solution, until the weight of the fixture, and road conditions caused the rat fur and insulation to pull away from the ceiling.


UPDATE: The shaking and pounding caused one of the LED bulbs to break at the base. Not sure if there's any way to cushion the lamp. Replacement LED lamps are easy at Amazon. http://www.amazon.com/gp/product/B0087XOTWW/ref=ox_sc_act_title_3?ie=UTF8&psc=1&smid=A2IME0Z5O2LH6Y
However busy I may be I can't ignore the fact that camping season is nearly here. I know that some people will say that they camp year-round, but in New England most campgrounds do not open until mid May. So with that in mind there are still a few things I want to do before heading out. Tops on my list is installing the LED dome light over the dinette. NOT easier said than done. My 13ft Scamp with fiberglass shell was never designed to have an overhead dome light. No wiring, and more confounding, no place to mount a fixture. Fishing the wires is not a big deal. A small slit in the rat fur and an electrical tape will pull wires easily enough. But how to mount the light?
1st attempt: gluing the fixture directly to the rat fur.


UPDATE: For some reason this fixture burned out after only an hour or so of continuous use. Maybe a bad fixture, but some people suggest it may be a case of over-voltage, and that LEDs are more susceptible to over-voltages than other, more traditional bulbs are.
The fixture, glued directly to the rat fur seemed to be the solution, until the weight of the fixture, and road conditions caused the rat fur and insulation to pull away from the ceiling.
2nd install photos. This time cutting a spot on the rat fur and gluing a wood block directly to the FG shell, and attaching the fixture to the wood using the screws included. ( The fixture itself did not have enough area that touches the fiberglass otherwise you could just glue the whole fixture to the fiberglass without the wooden base.

 |
| routing the edge so that it overlaps the rat fur |

UPDATE: The shaking and pounding caused one of the LED bulbs to break at the base. Not sure if there's any way to cushion the lamp. Replacement LED lamps are easy at Amazon. http://www.amazon.com/gp/product/B0087XOTWW/ref=ox_sc_act_title_3?ie=UTF8&psc=1&smid=A2IME0Z5O2LH6Y
Thursday, March 15, 2012
Electrifying events

 Finding a location for the WFCO power converter in a 10ft camper is not an easy task. There are certain requirements: A flat vertical space at least 7" tall by 11" wide,with a depth of at least 8". It must be easily accessible in case of a tripped breaker or a blown fuse. It must be near the majority of existing electrical wiring. That left me with really only one choice. the left side of the sink cabinet. Not optimal, but it'll have to do. The converter has a flip open cover that in this case butts up against the dinette's seat cushion ( and thus the bed).
Initial installation required cutting the hole into the fiberglass cabinet. Not something I really cared to do since the cabinet in the Scamp is a structural component. Much like a fiberglass boat, the interior fittings on the scamp help provide structural integrity. The two black straps you see in the photos are metal rods that are attached to the upper cabinet which itself is attached to the roof. The rods prevent the weight of the upper cabinet from stressing the roof and causing it to sag. I'm hoping that once the converter is installed, and reinforced with wood and epoxy backing, the integrity will be as before.
Note the duplex 110 outlet to the left...I replaced the existing one with a GFCI version. It ain't the way I wanted it, [but] I can handle things! I'm smart! Not like everybody says... like dumb... I'm smart and I want respect!
God I love a good Godfather II reference. RIP Fredo.
Wednesday, March 14, 2012
Instant Expert
Batteries have become a passion of late. I have become an instant expert on battery types, relative costs, pros and cons, and the problems that arise when you have no clue how big a battery really is. After months of research and advice from fellow RV owners I decided to go on a gut hunch and ordered the Exide Orbital 34XCD Sealed Maintenance-Free (AGM) Deep-Cycle Automotive Battery. Available from Amazon for $142.00. It seemed to me to be a good compromise between a $85.00 Wal-Mart battery and a seemingly overpriced $190.00 Optima battery. Contrary to reviews on Amazon this battery came with both top and side connectors. This comes into play as the story continues.

 I wanted to mount the battery on the inside driver's side compartment of my 13 ft Scamp for a number of reasons. Theft, Weight distribution, easy access to the battery, and access to storage. Try as I may I could not find a locking battery box to mount on the tongue of the camper. I have heard tales of campers returning to their site only to discover that someone has liberated their battery...Keeping batteries outside used to be the norm, but since AGM batteries are sealed there is little possibility of it venting hydrogen gas, so I decided to mount it inside under the front bench. Initially I wanted to put it on the driver's side in order to balance the weight of the water tank, but for some reason the battery was about 1/2" too tall to fit there. It did fit on the passenger side though.
My idea was to use top mounted cables with wing nut connections to enable me to easily remove the battery for in-between use charging. However the wing thing wasn't working. The battery case wouldn't allow them, so I thought about it...I really only need to remove the battery during the winter. The converter will charge it between uses. Realizing that, I went with side mounted cables and covered the top lugs. This gave me the extra 1/8" clearance I needed. Otherwise I would have had to rout out some space on the storage area cover.
Next I wanted to mount the DC to AC converter as close as possible to the battery. They seem to work better with a shorter cable length. The converter is mounted on its side, and I made a cut in the fiberglass seat to access the receptacles. Not the most convenient spot, and had the battery fit on the driver's side as intended the outlets would have been tucked in the corner. However since these will rarely be used it seemed an acceptable compromise. Now I am looking for something to dress up the hole I cut. initially I thought I could use one of those outlet covers that people use in the garden or garage, but the converter's front plate is too large. maybe just a bead of caulk, unless you can think of a different type of outlet cover.
Friday, March 9, 2012
Three Fails in a row.
Yesterday it hit 65 F. so I went to uncover the Scamp and start work on some of the electrical and other minor things. This led to a series of failures and facepalms.
 My first discovery: Blue tarps are not waterproof. I had all good intentions last Fall and purchased a canvas drop cloth and blue tarp to cover the Scamp. The idea was that the canvas would prevent any scuffing of the fiberglass while the blue tarp would keep things dry. Things did not go as planned, as when I removed the blue tarp the canvas was soaked, and some green slime had taken over parts of the top of the Scamp.
My 2nd discovery: The replacement handle I purchased for the tongue jack isn't a 100% replacement. It fits, it cranks, but it doesn't fold properly. The built in stops prevent it from folding more than about 60degrees. It'll be fine, and certainly makes it easier to adjust the jack.


 Also I made a feeble attempt to add some storage for hoses and drains. I built a 4 ft long by 4 in PVC pipe with screw caps on either end and attempted to mount it to the underside of the tongue. In concept this is a good idea. However the failure of it all is that I spent $18.00 on a 10 foot section of PVC pipe, and another 25.00 on fittings and brackets only to discover that A. I had 6 ft of PVC pipe already in my basement that has been sitting there for 25 years. (this discovered immediately after cutting the newly purchased 10ft pipe as I went to store the unused section -right next to where I stored the previously unused section 25 years ago.), and B. The brackets aren't quite right, and the pipe is not a snug fit against the frame. I think I'll have to fashion some U shaped brackets out of threaded rod. I've seen that done on the FiberglassRV forum.
 My first discovery: Blue tarps are not waterproof. I had all good intentions last Fall and purchased a canvas drop cloth and blue tarp to cover the Scamp. The idea was that the canvas would prevent any scuffing of the fiberglass while the blue tarp would keep things dry. Things did not go as planned, as when I removed the blue tarp the canvas was soaked, and some green slime had taken over parts of the top of the Scamp.
My 2nd discovery: The replacement handle I purchased for the tongue jack isn't a 100% replacement. It fits, it cranks, but it doesn't fold properly. The built in stops prevent it from folding more than about 60degrees. It'll be fine, and certainly makes it easier to adjust the jack.


Monday, February 27, 2012
Insure I can Insure I can
Like The Tittle Engine that could I am approaching the long hill climb to the RMV. Round Two: Preparing for the upcoming season I am now in the process of re-registering the trailer. Two things have happened , well three really. (1) I lost the license plate. It probably fell off 5 minutes after I left Rome. I'm not really sure if it matters, since (2) all trailer registrations have to be renewed annually in MA. I knew this going in, and thought it absurd since most auto registrations are good for two years*. Finally (3) I changed insurance from Progressive to Allstate.
Allstate does not have a physical presence in MA. Which begs the question: How do I get their stamp on the RMV form? Perhaps there's a new device or system of interconnected communication that could help? But alas this is Massachusetts, and we are talking about and the RMV. Form One must have a stamp!
A call to Allstate hooks me up with a lovely lady in Mumbai who at first tells me that Allstate does not insure campers in MA. (So did Progressive if you recall.) I, now an expert at this, informed her that all I needed was an endorsement proving insurance-just like for my car. This seemed to work. However the nice lady in Mumbai can't do it and has to transfer me to another department which at the moment is not answering their phones. She promised she would send them a message and that they will call me.... we'll see how that goes.
* Seriously? One year registrations for trailers? If Massachusetts didn't change the director of the RMV more often than most people change underwear they may be able to address this and other absurdities and anachronisms. E.G. The MA RMV does not notify you that the trailer registration has expired, so I guess there's no automatic renewal, no on-line option for trailers. The most egregious offense, they stopped notifying people that your driver's license is about to expire!
Monday, February 13, 2012
Barking and Clucking
A waste of an opportunity.
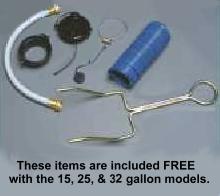
Remember a few posts ago I mentioned that I was purchasing a 15 gallon Barker waste water tank? Well it arrived, and quite frankly I am underwhelmed. The cost of these units seems extraordinarily high compared to the amount of thought that actually went into the design of the unit. Please understand this is not a complaint about quality, the tank and the components are made of quality materials, rather me just shaking my head and clucking at the poor user interface. First, the tank comes complete with a 1 ft section of hose, far too short to reach the gray water outlet on my rather small Scamp. Three to five feet would be far more useful for most people. Second, it came with a 3"solid cap, and a 3" discharge cap for dumping waste water, a 3" by 4ft wire wound coiled vinyl tube, and a hose clamp. Nice except the tube does not fit over the discharge cap. No amount of force could make it fit. Now I see this as a quality control problem too. Did anyone at Barker try to assemble these? Third, the so-called tow handle. Supposedly this is designed to wedge under the tank's molded plastic handle and allow someone to tow it to the dump station. Really? It has no mechanical attachment to the tank. From my early assessment, towing this along most camp ground roads could easily dislodge the handle from the tank. (Please reply if your experience is different) Finally other than a cap tether, which broke after only a couple of uses, the lack of any storage or attachment points for these various accessories. Would it have killed them to mold in a place to store the hose and handle, or add a tether to the garden hose cap at the top of the tank?
Problem solving: I can't do much about the missing storage points, but I did find a cheap alternative to the ill fitting 3" dump hose. WalMart has a $3.47 cap that has a standard garden hose attachment point. Now since this will always be a grey water tank I think the garden hose outlet will be plenty adequate for dumping. For the price of these tanks I think that the manufacturer should offer this instead of the plain Jane cap that comes with the tank, and they should probably make sure hoses fit the caps they were intended for.


Sunday, February 5, 2012
Show Power
Yesterday I went to the Boston RV show with a few camper buddies. I knew going in that Scamp would not be an exhibitor, I was there to tag along as one couple decided whether and when to upgrade their own RV, and to see some parts dealers. I had a shopping list, but was disappointed to find only one parts dealer at the show. Also disappointed to see that his prices were not so show special. I wanted to purchase a 15 gallon Barker waste water tote. He had it at $126.00 plus Mass' 6.25% sales tax. I have found them online for as low as $94.00 including shipping...tax free.

For a while now I have been on the fence about which power converter to buy. I need to start assembling the pieces required to rebuild the 12v system in my Scamp. As we were touring through the RVs on display I began to notice that almost all of them used WFCO converters. I have had my eye on one on eBay for some time, so this morning I went ahead and purchased it. The WFCO 8712.

I'm pretty sure 30Amps AC will be more than enough to power my 10 foot Scamp. Currently (current-ly, get it) it has a 15Amp main breaker. I have been told by some that 12Amps DC is quite enough, and not enough by others. So far I will be powering 4 LED dome lights, a standard car radio, (this will be discussed in an upcoming post), an exhaust fan, and possibly a TV/DVD player. I will have 12v plugs for people to visit with their Game-Boys, or iPads, and when I am not on shore power I will have 110V from the 400watt converter mentioned in an earlier post.
Somewhere out there is an electrical wizard that may be able to tell me if 12amps (DC) will be enough, but for now I'm satisfied just by the sheer number of manufacturers that use it, that the WFCO brand is the way to go.
addendum 2/10
I just received the WFCO 8712. Nice looking, well built unit, but the manual is lacking. For example it states that on the AC side the 8712 supports a 30 amp main and up to three branch circuits. Not so much. The box only has room for two breakers. Sure I could take one of those spots and install a double breaker, but the other? Is it for the mains power? Is it another branch? Is it both?... Somewhere out there someone has published a better manual. I saw it, I just didn't bookmark it at the time.

For a while now I have been on the fence about which power converter to buy. I need to start assembling the pieces required to rebuild the 12v system in my Scamp. As we were touring through the RVs on display I began to notice that almost all of them used WFCO converters. I have had my eye on one on eBay for some time, so this morning I went ahead and purchased it. The WFCO 8712.

The WFCO8712 features
| ||||||||||||||||||||
|
I'm pretty sure 30Amps AC will be more than enough to power my 10 foot Scamp. Currently (current-ly, get it) it has a 15Amp main breaker. I have been told by some that 12Amps DC is quite enough, and not enough by others. So far I will be powering 4 LED dome lights, a standard car radio, (this will be discussed in an upcoming post), an exhaust fan, and possibly a TV/DVD player. I will have 12v plugs for people to visit with their Game-Boys, or iPads, and when I am not on shore power I will have 110V from the 400watt converter mentioned in an earlier post.
Somewhere out there is an electrical wizard that may be able to tell me if 12amps (DC) will be enough, but for now I'm satisfied just by the sheer number of manufacturers that use it, that the WFCO brand is the way to go.
addendum 2/10
I just received the WFCO 8712. Nice looking, well built unit, but the manual is lacking. For example it states that on the AC side the 8712 supports a 30 amp main and up to three branch circuits. Not so much. The box only has room for two breakers. Sure I could take one of those spots and install a double breaker, but the other? Is it for the mains power? Is it another branch? Is it both?... Somewhere out there someone has published a better manual. I saw it, I just didn't bookmark it at the time.
Thursday, February 2, 2012
First Light

 A 59 degree day in February gives cabin fever a whole new meaning. So today I unwrapped my Scamp and ventured inside to begin the installation of the new LED lights. Part one is simple enough, replace the two existing OEM incandescant fixtures with the new LED ones. The OEM lights are riveted onto the fibeglass cabinet above the sink and stove. It became a matter of drilling out the old rivets and replacing with the new. Finding long rivets is a problem. The Home Center had a fairly limited choice. The longest I could find was 1/2" and that required me to drill new mounting holes on the LED lights. The built in holes would requre a much longer rivet. The new fixture is taller than the old, but not as wide, so that leaves two holes visible from the old rivets. As of now I will leave them but I hope to find some little caps or plugs. Oh, by the way I wasn't able to test these new lights. I still have no battery. but am thinking of the Exide 34X. Seems to be a good compromise. it is an AGM, deep cycle multi-duty, and at around $150.00 fits my target price.

Sunday, January 29, 2012
Event Planning
I'm a big fan of Bob Thomson's book The New Victory Garden. In it he displays a child-like enthusiasm waiting in the early weeks of January for the seed catalogs to arrive so he can start planning his garden. When they arrive he sits and sorts and plots and plans until his entire garden is completely planted in his head. He knows to the day when he will be able to pick that first tomato.
Up until now however I have not a big fan of planning ahead. The only thing that for me is certain is an annual August camping trip that must be reserved in February. Other than that I wake up on a Saturday morning, look at the club calendar and decide what to do that weekend. Since the Scamp I have started to change it up a bit. I have been looking deeper into the calander, several months in advance, planning which events I will attend, which will require camping overnight, and starting to look at campsites in the area of the event.
Yesterday I learned that what would have been my first camping friendly event this year may be cancelled. Bummer. I learned this from a couple who were also planning to bring their new camper to the event. So we started to plan alternatives, and that got me thinking, why not plan my own camping events? There's plenty of State parks in New England with plenty of available spaces. So I jumped on the ReserveAmerica Web site and picked a few choice weekends in the Spring. My garden may suffer this year, but the Scamp will get used as often as possible regardless of cancelled events.
I also found out that the New England RV Dealers Association's Boston RV & Camping Expo will be next weekend, February 2-5, 2012 at the Seaport World Trade Center - Boston, MA. I went last year, and though there were no Fiberglass eggs on display I did get a ton of information about campgrounds in New England. Each state was represented, and all had nice guidebooks available for the asking. The guidebooks not only list state parks but private campgrounds, attractions, restaurants and some events and festivals that occur annually.
Sunday, January 22, 2012
Getting a handle on things
I think I am starting to get a handle on some of the minor repairs that my Scamp needs. The previous owner managed to mangle the handle of the tongue jack which is used to level the trailer. I thought in this disposable world I would have to replace the entire jack. Easier said than done, because it is welded onto the frame of the trailer. Problem solved. Instead of replacing the welded on tongue jack I found the mother load of all replacement handles. http://accessories.etrailer.com/search?w=jack%20handle. It looks like this one will work.
 The Web site even has a quick video showing how to remove the old broken one and replace it. http://www.etrailer.com/Accessories-and-Parts/Dutton-Lainson/DL22674.html
Note to E-trailer.com - the video does not work properly on a Mac using Firefox. Or should that be a note to Firefox? Well, considering it works fine in Safari...
The Web site even has a quick video showing how to remove the old broken one and replace it. http://www.etrailer.com/Accessories-and-Parts/Dutton-Lainson/DL22674.htmlNote to E-trailer.com - the video does not work properly on a Mac using Firefox. Or should that be a note to Firefox? Well, considering it works fine in Safari...
Wednesday, January 18, 2012
Feeding The Habit.
Since buying my scamp I have been downsizing other hobbies to fund some of the improvements I want to incorporate into the scamp. I've mentioned new lighting, a revamped 12 volt system, cooktop and others. I've been selling some old collectibles and vintage toys, but yesterday I sold my first hobby...photography. I've been shooting since I was seven or eight years old. My first camera used 120 roll film and was purchased from an ad in the back of a comic book. I graduated to the Kodak Instamatic and flash cubes, and eventually to a real beauty; the Yashicamat 124G. All these cameras, and a job at a camera store led to developing and printing my own pictures in a darkroom fully equipped with an enlarger, sink, safelight etc. Over the years I went through all the phases of photography. I at one time or another owned a Nikon, Canon, Olympus, even a WWII vintage Leica. I went from 120 to 35mm to 4"X 5" with a beautiful Nagoka field camera. Later I decided that this was all too much, and that the equipment was getting into the way of photography. And besides, color was becoming my preferred medium. I sold it all. Every bit of it except for one Olympus OM3 camera. I was determined to concentrate on the image instead of the tech.
 Cut to 25 years later. Lomography is in vogue. For those who don't know Lomography consists of using vintage cameras or modern reproductions of them to shoot. Some use 120 film, others use 35mm. I have always had an original Diana. I never did sell this little plastic camera, so I thought I'd try my hand at shooting some black and white. Since the advent of digital photography there are few resources available to develop and print black and white, so I proceeded to reacquire a complete darkroom setup. I was able to find an otherwise $250.oo enlarger for less than $50.00, and quickly accumulated all the other equipment. And that's as far as it went. Yes I did shoot some film, and yes I developed it, but never got around to setting up the darkroom.
I sold it all yesterday.
I will use the funds to purchase a nice battery for my Scamp.
Oh, that photo above? I took that with a Nikon F2, 1/60th sec. 400mm F5.6 lens, Ectachrome 400 film pushed two stops. (developed 3x longer than normal to increase the ASA to 1600).

I sold it all yesterday.
I will use the funds to purchase a nice battery for my Scamp.
Oh, that photo above? I took that with a Nikon F2, 1/60th sec. 400mm F5.6 lens, Ectachrome 400 film pushed two stops. (developed 3x longer than normal to increase the ASA to 1600).
Friday, January 13, 2012
Through the roof
So I've determined that all of these side cabinets mentioned in a previous post are home made. For the 13 foot model Scamp only ever made a rear cabinet over the dinette, and a front cabinet that hangs over the bunk beds*. I think the one over the bunks would be a bit intrusive on headroom. The Over the dinette cabinet can be ordered from Scamp for $150.00 and about the same in shipping costs. A number of people have just put up an open shelf, often matching measurements of certain accessories or games that they want to store there. I think I am going to explore that option. In my mind I envision a place to get stuff off of the table when it comes time to make up the bed. My major concern is properly supporting the shelf. Remember the Scamp is nothing more than a fiberglass shell. No wooden frame exists to screw things into. All additions would require drilling through the fiberglass and either bolting or riveting. I imagine the shelf would have to be supported from above. That means drilling through the roof. Something I am not looking forward to.
Another project is a folding countertop extension. Looking at adding about 18" of countertop next to the stove. this would be hanging over the lower bunk. This too would have to be mounted directly on the fiberglass cabinet. So I'd need to figure out how best to support a folding bracket or hinges.
I'd appreciate any comments from anyone with experience with fiberglass (campers or boats)
* UPDATE: Apparently some models of the 13 come with back and side upper cabinets ( over the dining/bed area.
Tuesday, January 10, 2012
Some assembly required
As the title states, some assembly required. I am in the process of assembling the bits and pieces that I need to update or replace old or outdated, or even missing items.
My first goal was to reinvigorate the propane system and install a new two burner cooktop. I found one on eBay for only $36.00, and it looked suitable. It fit right in the empty hole from the missing cooktop. I then needed a new propane regulator, and finding one wasn't as easy. You see the problem is I am cheap. Some people may say frugal, but I am just cheap. I went to the local RV dealer, only 52 miles away, and looked over their "Giant closeout sale" that did not include any of the stuff I needed. Their two stage propane regulator was around $70.00, so I thought surely I can find one cheaper. Amazon had one for $16.70, they also suggested that I purchase a regulator to tank hose. Only problem was the two did not fit. The regulator had a flare connector and the hose had a NPT connector. NEWSFLASH! NPT stands for Normal Pipe Thread. A quick trip to the Home Dept plumbing department turned up nothing that would convert these to fit each other. Luckily Amazon returns run smoothly and they soon replaced the hose with a proper one with a flare connection. Now I'm cooking with gas.
Here's a bunch of stuff that I have purchased so far. I still need a deep cycle battery, and a AC to DC converter/charger. I guess RVers call that a Power Center.
 |
| LED lights for the yet to be reinstalled 12V system. Including two singles to replace existing fixtures, and a new double dome. The Scamp currently does not have any overhead lighting. Talk about cheap, these were only $15.00 and $19.00 |
 |
| A double 12V cigarette lighter style socket that will be mounted into the cabinet ( somewhere yet to be determined). I purchased this at a local marine supply store. |
 |
| A 400 watt DC to AC inverter. This too will be mounted so that I can easily access it. It has two 110V plugs and a single USB plug. It will be wired directly to the battery...when I get one of those. I'm hoping that this will be adequate for the few times I would need to briefly run 110V stuff when not attached to shore power. I do however find myself flirting with the better endowed 700 watt inverters. |
Friday, January 6, 2012
The People's Camper

In a way I have come to see the Scamp as the Volkswagen of RVs. The 1987 model isn't that much different than the 2011 model. I can go on-line or call the factory and order everything from body parts to interior accessories. I can even order a complete toilet and shower kit. This lessens the fear factor when attempting repairs or modifications. I have already had to order a new inside door handle and rubber gaskets for the door. I was just about to order the propane tank hold downs until the guy I bought the Scamp from called and said he found them in his garage. I've talked with the factory reps about ordering and installing additional overhead cabinets. Initially I wanted another cabinet to mount over the dinette at the rear of the camper, but just yesterday I saw a photo of an additional side mounted cabinet. I need to do some research to see if this was available for the 13'. It may have only been for the 16' or19'. Or I could just call the factory.

Sunday, January 1, 2012
First Night
Meant to post this last night ( New Year's Eve)...
So after getting the camper home a break-in trip was planned. My friend John who owns a 24 ft camper was planning an early October week in the Monadnock mountains in NH. Specifically Crotched Mountain. We do an annual Kite festival there for the Crotched Mountain School for brain injured children and young adults. It is part of their family day event. We fly kites outdoors for the kids and parents, and indoors with specially adapted kites for the kids in wheelchairs. Yes, kites fly indoors and no, we don't use fans.
Anyway, the trip was planned to go to a NH State Park. John had been there for a couple of days and was there to greet me and guide me into my camping spot. Remember I have never backed up with a trailer. We gave it a few attempts, but the short wheel base of my Tucson, combined with the very short Scamp made it nearly impossible. The slightest turn of the steering wheel made the Scamp swivel as if on a pivot. Soon I started smelling burning clutch ( My Tucson has a manual transmission), so we stopped the lesson and I pulled in to the site rather than backing in, and used the trailer dolly to position the Scamp.
At the campground besides water there are no hook ups. John has a quiet Honda Generator, which was great because I still don't have a functioning 12 volt system. We ran a cord from his generator to my Scamp. This at least gave me interior lights.
Things I learned right away:
1. It gets cold in the mountains in early October.
2. An electric heater could have made life more bearable.
The temperatures dropped to below freezing by bedtime. I had a small Propane two burner camp stove, so I thought I would crack a window and heat up the Scamp before bed. This did in fact work, but the camper quickly lost most of the heat and sleeping was difficult even with a heavy sleeping bag. Every time I turned I hit a cold spot and was jolted awake. The next morning cooking breakfast and coffee was enough to quickly heat the camper.
I don't advise using your propane cooker as a heat source. Unlike catalytic heaters the flame of a cooktop is inefficient, and lets off loads of carbon monoxide. So cracking a window, which is also required of catalytic heaters, is mandatory.
I'm looking into a 1500BTU catalytic heater. The Coleman Sportscat will do the trick I hope. Otherwise a built in RV furnace could cost about $600.00 Luckily for me I would only need heat for a few days at the beginning and end of the season. I don't see myself winter camping anytime soon.
Subscribe to:
Posts (Atom)